
Using CapCut PC’s Auto Reframe to Fit Videos for Different Social Media Platforms
Resizing videos to accommodate various social media websites is a task. All sites, such as TikTok, Instagram, YouTube, and Facebook, have various sizes and shapes of videos.
It is difficult to produce a single video that will suit everything. The Auto Reframe feature of the CapCut PC eradicates this problem by automatically resizing and reframing videos.
It maintains the focus on the central subject while adjusting the shape of the video to suit the site.
Apart from this, the CapCut desktop video editor also has features such as text to speech to provide videos with greater accessibility and entertainment for every viewer.
How Auto Reframe Works in CapCut Desktop Video Editor
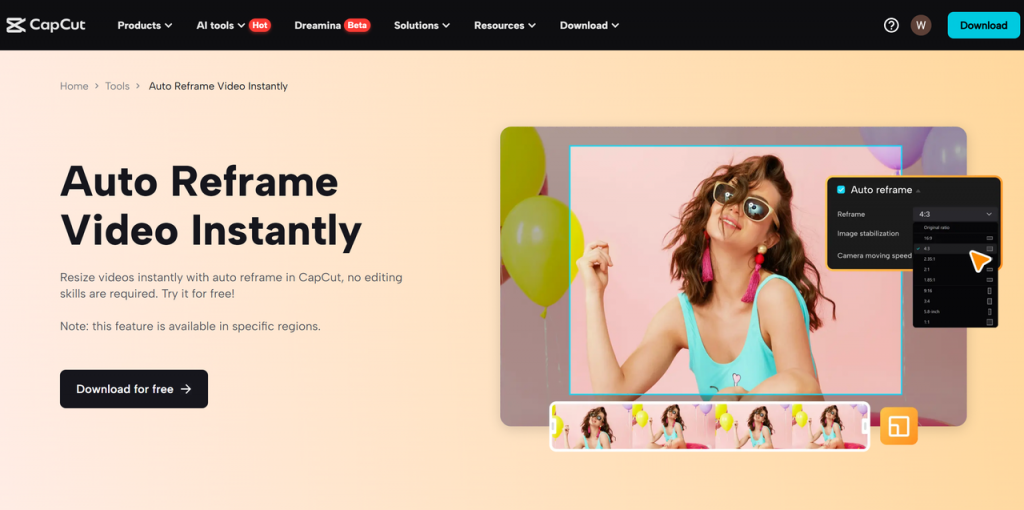
Auto Reframe is a clever feature of the CapCut desktop video editor that automatically adapts the size and form of your video to accommodate various platforms.
It employs AI to identify the primary subject in each frame and maintains it centered as the video resizes. That is, your video will appear great regardless of whether it’s vertical for TikTok (9:16), square for Instagram (1:1), or wide for YouTube (16:9).
The CapCut PC program has a lot of tools, but others like Auto Reframe are paid or subscription-based, while others like basic tools might come for free or on trial.
Apart from Auto Reframe, CapCut PC also has useful tools such as an AI video generator that allows you to make videos in a snap and makes it simple to create content to your specifications. This combination helps save time and improve the quality of your videos.
Why Use Auto Reframe for Social Media Videos?
Different social media platforms need videos in different shapes and sizes to look their best. For example, Instagram prefers square videos, TikTok uses vertical videos, and YouTube uses wide videos.
Making these adjustments manually is time-consuming and results in errors, particularly if attempting to maintain the dominant object within the screen.
The Auto Reframe tool within CapCut PC is helpful in that it expedites the process by resizing and reshaping the video to meet each platform’s requirements.
It also saves additional tools, such as image stabilization and control of camera movement, to produce smoother and more professional videos.
In addition to these video tools, CapCut PC has a voice changer that allows you to transform audio to fit your video style to make your content more creative and entertaining.
With Auto Reframe, you can be sure your videos will look amazing everywhere without additional effort.
Step-by-Step Guide to Using Auto Reframe on CapCut PC
Step 1: Download and Install CapCut Desktop Video Editor
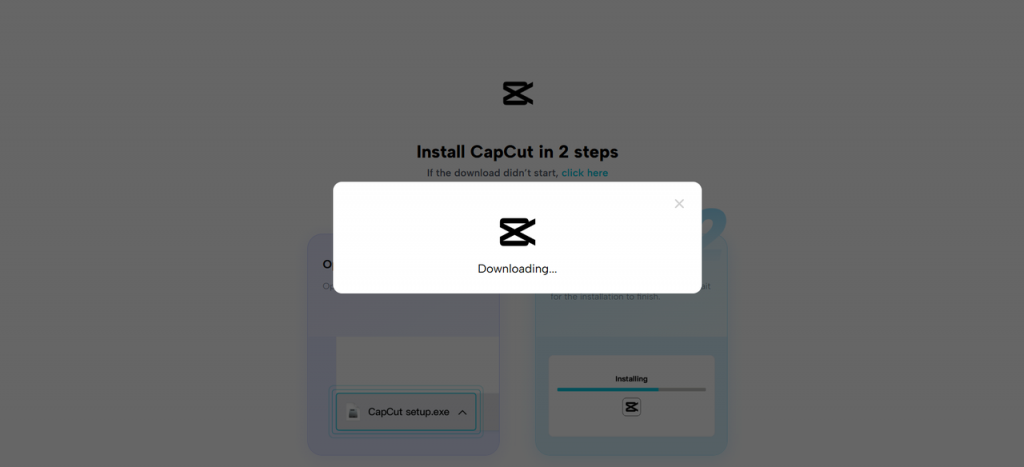
Begin by going to the official CapCut website to download the CapCut PC application. This will provide you with a secure and authentic copy.
Press the “Download for Windows” or “Download for Mac” button, depending on your computer. Once the download is complete, go to the installer file (presumably in your downloads directory) by double-clicking on it.
Follow the prompts on the screen, like accepting terms and selecting where to install them. Once you’ve installed CapCut desktop video editor, double-click on it to open from your desktop or start menu.
You might be required to log in with your Google, TikTok, or Facebook account in order to sync your projects.
Step 2: Import Your Video
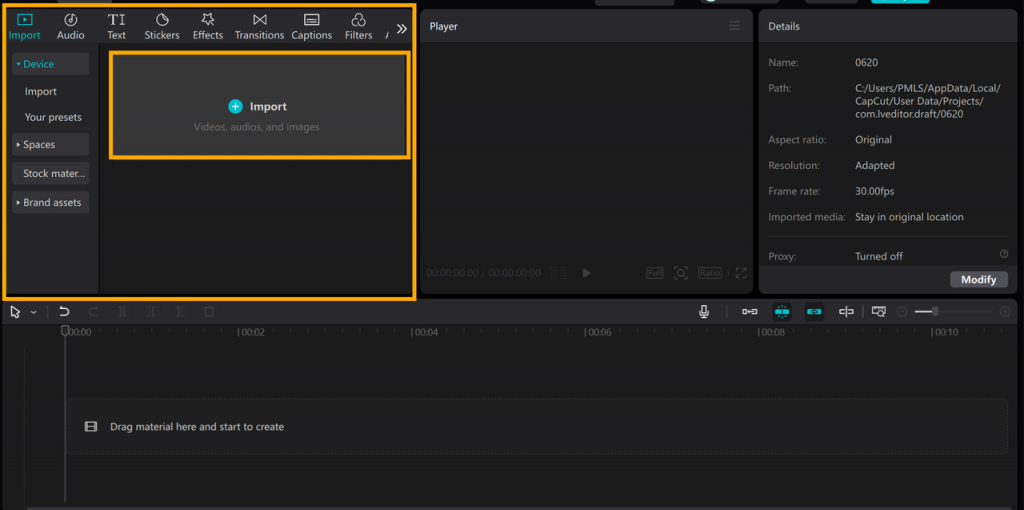
Open CapCut PC and begin a new project. To insert your video, drag and drop the file into the timeline or tap the “Import” button at the top left. Choose the video from your device and wait for it to be loaded into the editor. If your current computer struggles with video editing tasks, consider upgrading — even getting a certified refurbished desktop PC can make a big difference in performance.
Step 3: Apply Auto Reframe
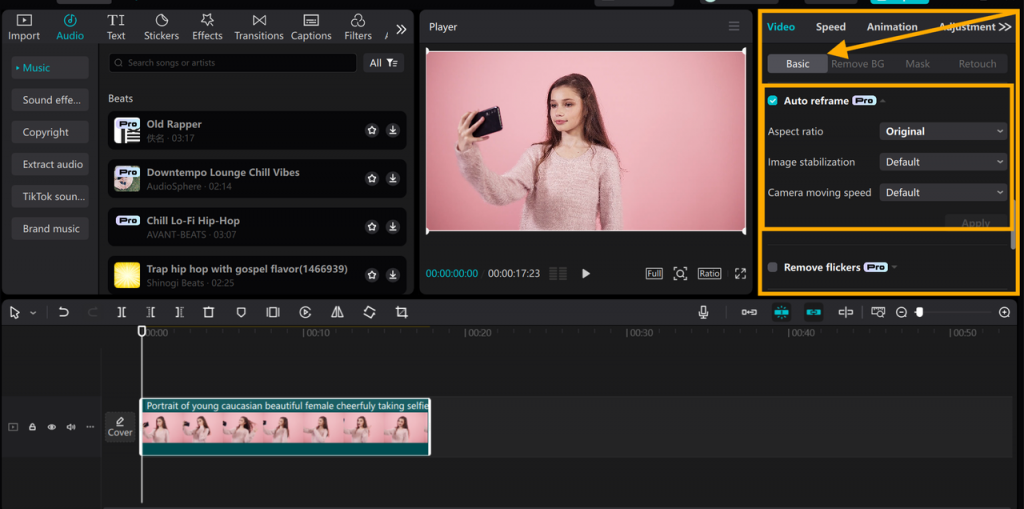
Click on the video clip in the timeline to open it. Search for the “Basic” tab or the right-side editing panel. Locate and click the “Auto reframe” feature.
Select the aspect ratio you prefer, e.g., 9:16 for TikTok or 1:1 for Instagram. You may also enable image stabilization and adjust camera motion speed to smooth out the video, particularly if your content is highly mobile.
Step 4: Preview and Refine
Play the video in the preview window to see if the subject remains centered and the framing appears normal. If necessary, adjust the settings to fine-tune the framing or stabilization until satisfied with the output.
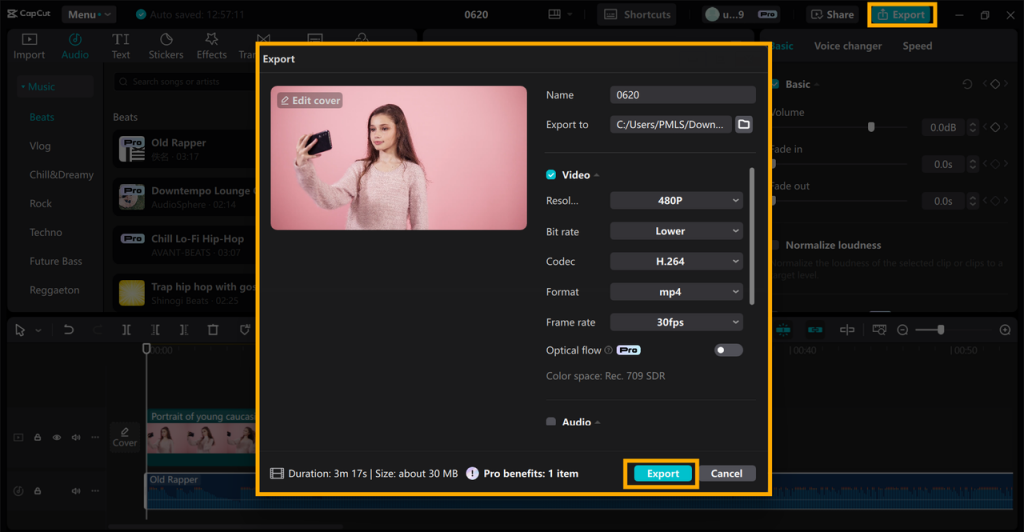
Step 5: Export and Share
After you’re satisfied, press the “Export” button. Select a resolution and format appropriate for your target platform. Save the video to your device. You can now directly upload it to social media or share it where you prefer.
Best Practices with Auto Reframe
Employ videos with simple and clear subjects. This makes it easier for the CapCut desktop video editor to identify the central focus and frame it appropriately.
Shuffle camera movement and image stabilization based on how much movement is in the video. This smooths out the video and is easier to view.
Always preview the video before exporting to ensure no key sections are removed. Also, consider the guidelines of each social media site, such as video length, format, and size. By doing these things, your videos will be their best on any site.
Conclusion
Auto Reframe of CapCut PC simplifies resizing videos for all social networks instantly. It assists in keeping your primary subject sharp and saves your time.
Give this feature a try to enhance your video content. Keep in mind that certain advanced features in CapCap PC may have some costs. Try Auto Reframe in CapCut PC today to create videos that look great on any platform.